An Image Gallery is used when you want to display a series of photos in a gallery on a post or page.
Here’s an example of an image gallery:

You use insert an image gallery into to posts or pages by either:
A. Uploading images from your computer
B. Using images from your media library
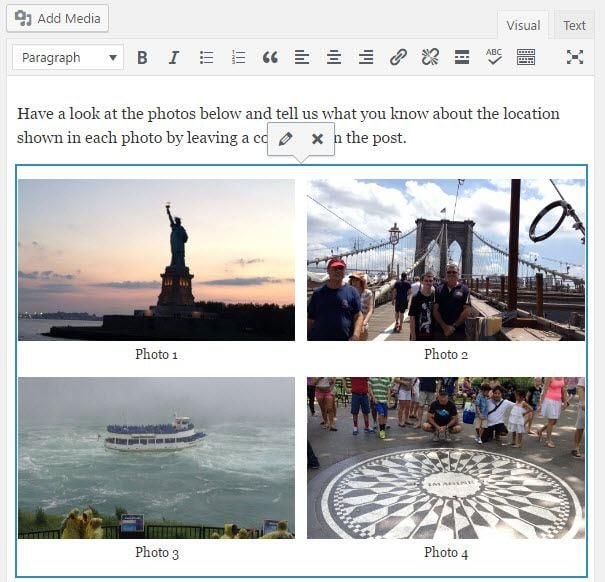
By default, image galleries are inserted as a thumbnail grid style.
You can extend the types of image galleries you insert into posts and pages to include tiled mosaic, square mosaic or circular grid using the Tiled Galleries module in the Jetpack plugin.
FROM YOUR COMPUTER
You can insert an image gallery into your posts by uploading images from your computer using the Add Media buttonas follows:
1. Go to Posts > Add New or Pages > Add New.

2. Place your cursor in your post/page editor where you want the image gallery to appear.
3. Click on the Add Media icon.

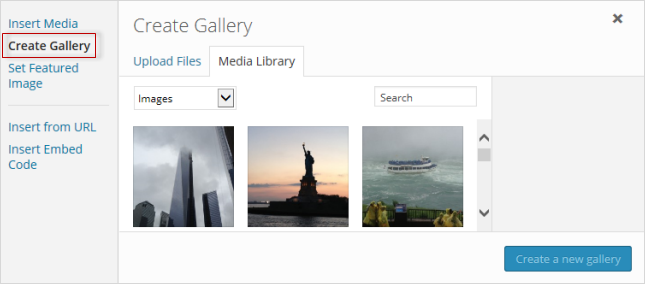
4. In the Add Media window click on the Create Gallery and then Select Files.
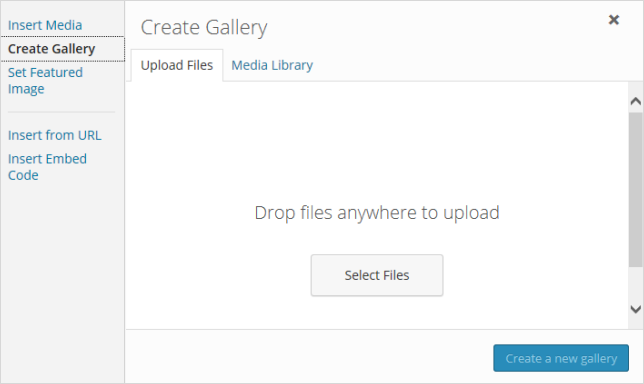
5. Locate the images on your hard drive using your Shift or Crtl key to select more than one image then click Open.
6. While your images are uploading you will see a progress bar.
7. Once uploaded click on Create a new Gallery.
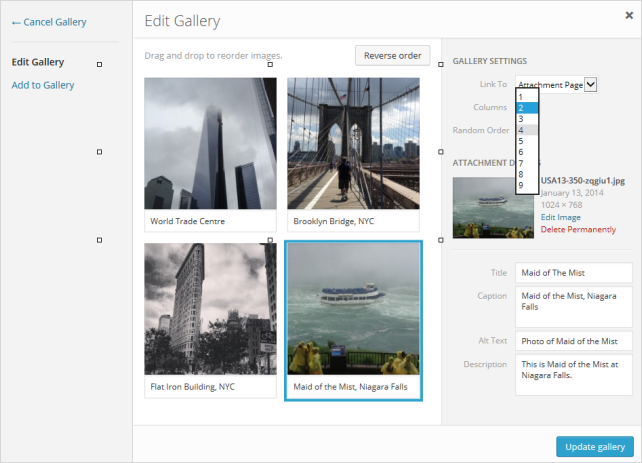
8. This takes you to the Edit Gallery window.
9. Click on each image to edit it’s title. caption, alternative text and description under Attachment details.
- Title: The title displays on the image attachment page.
- Caption: Image caption displayed directly below the image.
- Alt Text: The text displayed when image is not available.
You can change the order of photos by choosing Reverse order or using Random order. Alternatively, you can reorder photos by clicking on the photo and then dragging them to a new location.
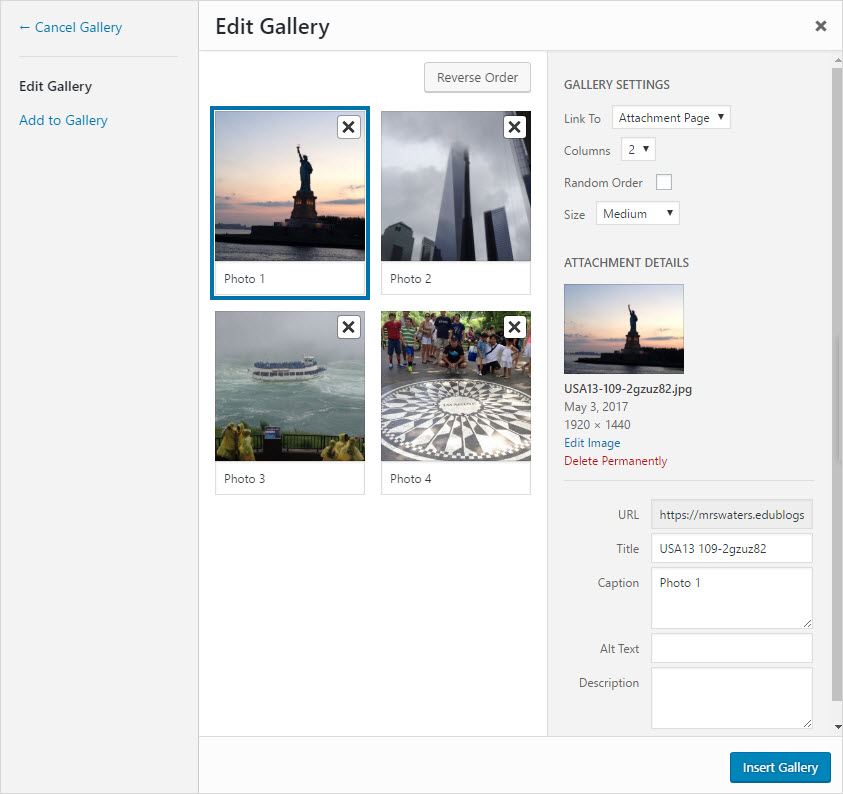
9. Choose how you want the gallery to be displayed in the Gallery Settings area.

- Link to:
- Attachment page: links the thumbnail image to a page set up specifically to display the image with all image details. Appearance of the attachment page varies depending on your theme.
- Media file: Links to the thumbnail image directly to the full size uploaded image.
- Columns: controls the number of columns of thumbnails that are displayed in your gallery.
- Random Order: select this option if you want the image order to change each time the page loads.
10. Click Insert Gallery.
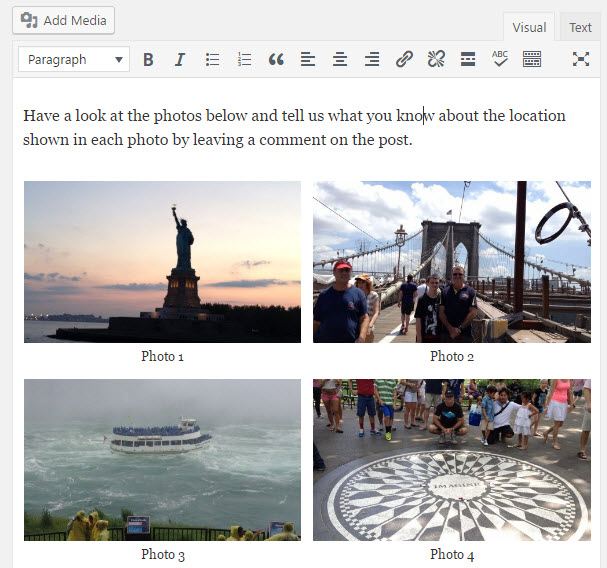
11. Your Add Media window will close and your image gallery will appear in your post/page editor as shown below.
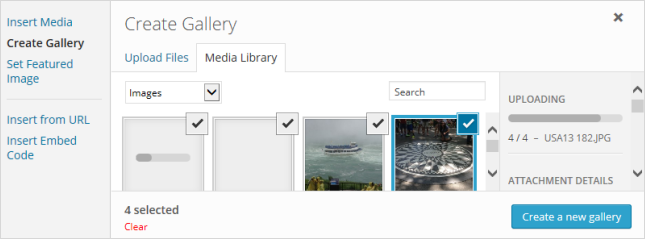
FROM YOUR MEDIA LIBRARY
You can insert an image gallery into your posts from your media library using the Add Media buttonas follows:
1. Go to Posts > Add New or Pages > Add New.

2. Place your cursor in your post/page editor where you want the image gallery to appear.
3. Click on the Add Media icon.

4. In the Add Media window click Create Gallery and then Media Library.
5. Locate the images you want to use in your Media Library and click on the images to select.
The selected images are highlighted with a grey border and a grey check mark in the top right corner.
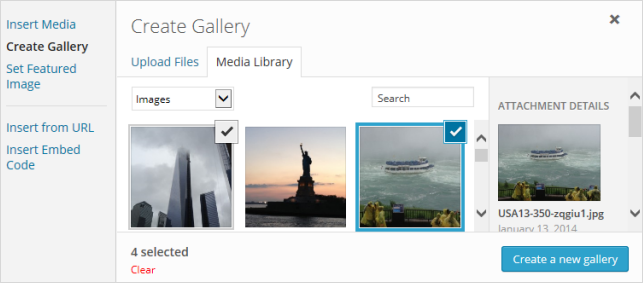
6. Once you’ve selected all the images you want to use click on Create a new Gallery.
7. This takes you to the Edit Gallery window.
8. Click on each image to edit it’s title. caption, alternative text and description under Attachment details.
- Title: The title displays on the image attachment page.
- Caption: Image caption displayed directly below the image.
- Alt Text: The text displayed when image is not available.
You can change the order of photos by choosing Reverse order or using Random order. Alternatively, you can reorder photos by clicking on the photo and then dragging them to a new location.
9. Choose how you want the gallery to be displayed in the Gallery Settings area.

- Link to:
- Attachment page: links the thumbnail image to a page set up specifically to display the image with all image details. Appearance of the attachment page varies depending on your theme.
- Media file: Links to the thumbnail image directly to the full size uploaded image.
- Columns: controls the number of columns of thumbnails that are displayed in your gallery.
- Random Order: select this option if you want the image order to change each time the page loads.
10. Click Insert Gallery.
11. Your Add Media window will close and your image gallery will appear in your post/page editor as shown below.
EDITING AN IMAGE GALLERY
You edit an image gallery as follows:
1. Click on the gallery and then click on the Edit (Pencil) icon that appears.
2. This launches the Edit Gallery window.
Here you can:
- Drag and drop images to change their order in the gallery.
- Select Random order or Reverse order.
- Edit image title, alternative text, caption and description by clicking on an image.
- Adjust gallery settings to change number of columns of thumbnails displayed in gallery or to change your link to option.
3. You can also add more images to your Gallery.
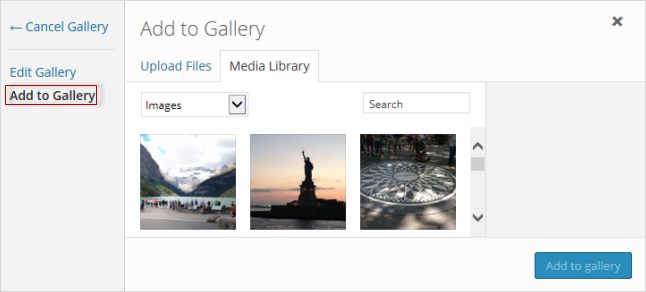
ADDING IMAGES TO YOUR GALLERY
You can add more images to your image gallery as follows:
1. Click on the gallery and then click on the Edit (Pencil) icon that appears.
2. This launches the Edit Gallery window.
3. Click on Add To Gallery tab.
4. Upload more photos from your computer using Upload File and/or add more photos from your Media Library by clicking on the images you want to add.
5. Click on Add to Gallery button.
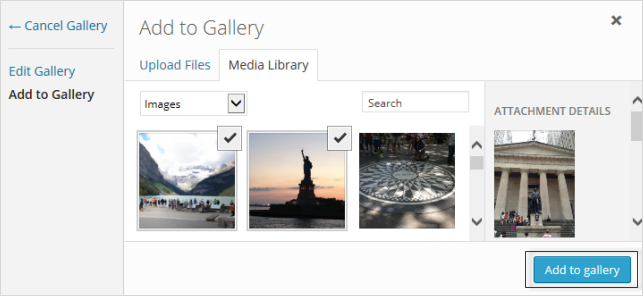
6. Edit image title, alternative text, caption and description by clicking on an image.
4. Once you have finished editing the gallery click Update Gallery.